
- Project
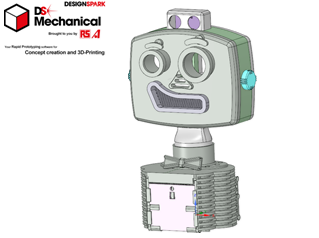
TalkBot - A talking head named Ed
I recently discovered that you can use the high speed PWM mode of the Arduino to replay audio from a micro SD card. This opens up all sorts of applications where speech, music or complex sounds are needed. So I decided to make a talking head. Why not make one too!
Project Overview
As I wasn’t sure how much code I would need to write for this project, it is based on an Arduino Mega. The head is controlled via a TV remote control, which allows you to select different play sequences. The code can play one or multiple audio tracks in succession and even run a quiz show based on direction from the TV remote. The LEDs in the mouth are modulated directly by the amplitude of the audio track. Servos are used for head side-to-side movement and to wiggle its eyebrows. The ultrasonic sensor at the top of the head allow it to detect and track people stood in front of it, to perform in an unattended mode. Click the image to the right to watch a video of my Talking Head in action -->

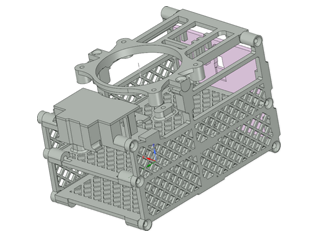
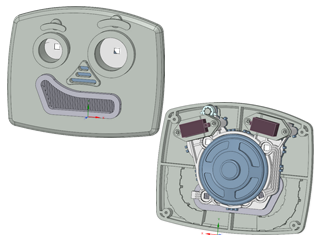
All of the Talking Head components were produced on my 3-D printer and modelled using the free 3-D design package from RS Components, DesignSpark Mechanical. For this design I constructed an assembly of the complete robot, to ensure that all of the parts aligned. This included simple models of the electronic components like the Arduino Mega, servo motors and speaker. The head mainly consists of a number of parts screwed together using 3mm nylon countersunk screws or dabs of soft-melt glue. To save on filament material several of the plates are perforate, which also gives limited views of the internal wiring.
The mounting plate for the RGB LEDs was spray painted with silver pain to improve its reflectivity before assembly. The .STL files for all of the 3-D parts can be downloaded from the link below, along with a PDF file showing views of the components and wiring being assembled.
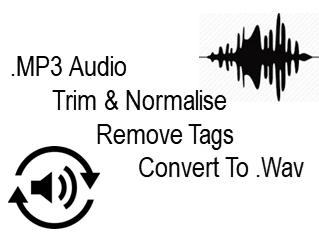
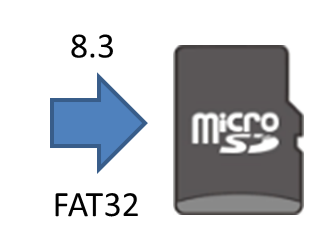
The audio files for the Talking Head are stored on an SD memory card, where they are saved as 16 kHz 8-bit mono WAV files. If your audio is sourced in MP3 format, you will need to convert it to WAV before it can be played. As the SD card is formatted in FAT32 the filenames must comply with the traditional 8+3 character DOS format, but can be structured and stored in folders.
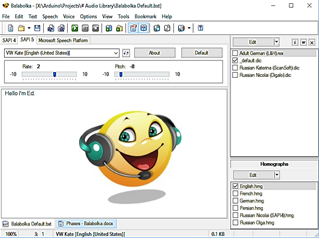
If you want your robot to speak you cam use a voice recording of your own, or a free text to voice translation program known as Balabolka. This techniques is better for forming sentences than playing consecutive words, which don’t sound natural due to the pauses between them.
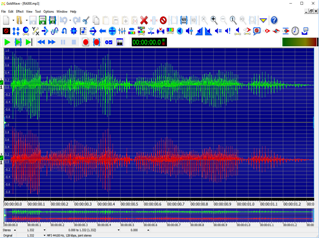
I always trim and normalise the audio files using Goldwave before stripping out the tags and converting them to .WAV format using AVS Audio Converter. But there are many free alternative apps that can do the same things.

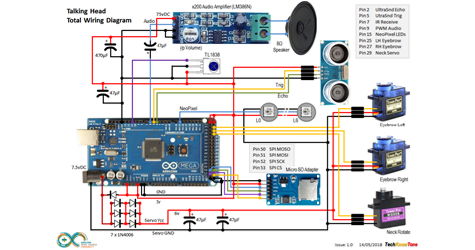
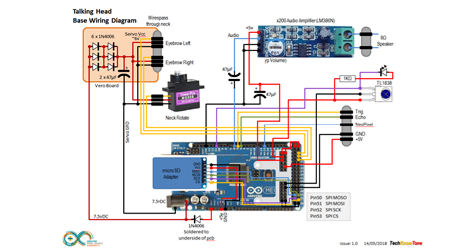
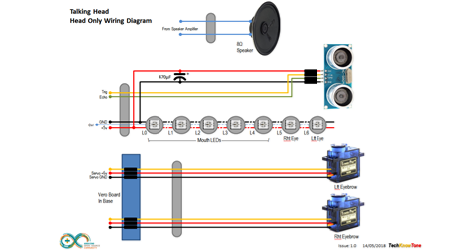
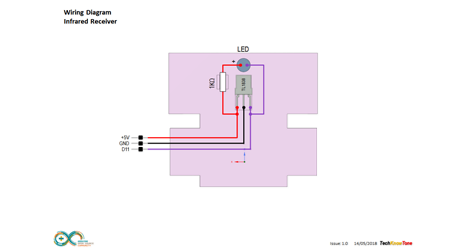
The circuit diagram for the Talking robot is shown here on the left, with the Arduino connected to the micro SD card using the SPI interface. The 7 RGB LEDs are connected in series to a single digital pin. Two plastic and one metal geared servo are connected directly, along with the Ultrasonic sensor and the infrared sensor. The audio output comes from a digital pin, and is decoupled using an electrolytic capacitor, connected to an audio amplifier.
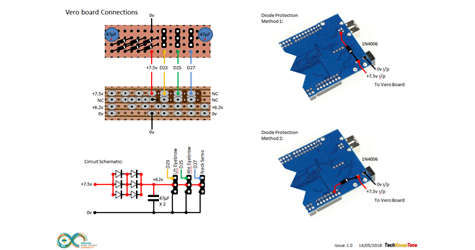
As with many of my designed, the 6v DC supply to the servos is taken from a diode stack, which drops the supply voltage from 7.2v. There is a reverse protection diode mounted on the back of the Arduino to protect the 5v regular from avalanching when the USB connection is made first.
Design Files
The following files can be downloaded to help you complete this project. Each has a hyper-link and an associated description. Depending on how your web browser is configured the links will either open the files directly into your browser or offer them as downloads.
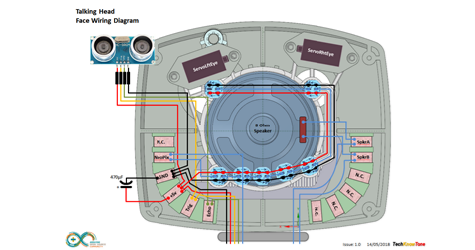
Circuit Diagram - a drawing of what is seen in the view above. Use it as a guide to wiring up your project.
Parts List- the things you will need and budget prices.
3-D Models - a zip file containing all of the STL files, which you can use with a slicer application.
Software Code - the all important Arduino .ino files which run the project. I’ve also included a folder with a few audio samples.
Demo Functions - two slides giving an indication of how a TV remote can be used to control Ed’s features.
Libraries
This project relies on the use of three libraries, SD.h, Adafruit_NeoPixel.h and IRremote.h which if not included in your IDE set-up, can be pulled in with the Library Manager. The SD.h library provides the interface for the micro SD card; Adafruit_NeoPixel.h provides functions for sending colours to the REGB LEDs and the IRremote.h functions allow you to read a TV remote. Note that the numeric codes used in this code may not match those sent by your TV remote, so you will need to experiment a little to determine them using the serial monitor.
Design Notes:
The following notes will help you understand how the files in this project work or can be used in principle. Each note has a bold heading for quick reference and they are listed in alphabetical order.
.ino File - the zip file provided contains several folders, which in turn contain the source code files. Therefore you will need to unzip it to use it.
Audio Samples - a small number of .WAV file samples are provided to get you started. Note that the code will refer to other files which aren’t included for copyright reasons. You will need to substitute your own .WAV filesto make the code wor, but at least the code structure shows you how to pull in files during head movements, when running a Quiz show, in jukebox mode and standalone mode in conjunction with the ultrasonic sensor.
3-D Models - the constructions of this design is based on the use of 3mm nylon countersink screws. I have excluded the models of the body, thinking that you might like to design something different for Ed. 3-D modelling is a great thing to learn, so give it a try!
Demo - these slides give you an understanding of how I use a TV remote to control ED during demonstrations. Whilst the lack of audio files wont allow you to run all exampled it should hopefully give you an indication of what was intended by the code.
Need more?
If you feel that I haven’t included enough information to allow you to tackle a project of this type then send me an email explaining what you need. Or if you just want to give me some general feedback on this site, or to suggest projects what I might include which would be interesting to you, I’d be pleased to hear from you.