
- Project
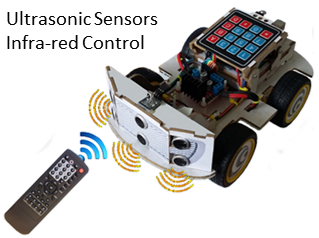
Robot Car - A 4x4 autonomous vehicle
This was my first mobile project, from which I learnt a lot about controlling DC motors, using infra-red control from a TV remote and coding autonomous independent behaviour. Why not make one too!
 |
|||||||
| Project Overview |
|||||||
|
|
|||||||
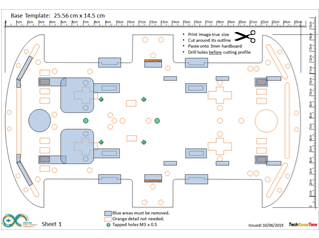
| When I started this project I didn’t realise how easy it was to control things using a TV infra-red remote control, so I opted for a 4x4 16 button keypad, which worked well for static programming of the various modes of operation. But once the car started to move you had no control over it. That problem was soon resolved by using an infra-red remote control, which not only doubles as a programming device, it also allows you to change settings on the move. For example the range of the ultrasonic sensors can be adjusted to suite the nature of the obstacles it might encounter when running in autonomous mode. The car is constructed from a kit base plate and a 3 mm hardboard structure, designed in 2-D using PowerPoint. This is a low cost way of making projects and it allows you to adorn them with really great graphics, designed by you or taken from the internet. Most inkjet printers are accurate enough to print your designs, ready to be pasted onto the hardboard and cut out with a fret saw. |
|||||||
|
|
|||||||
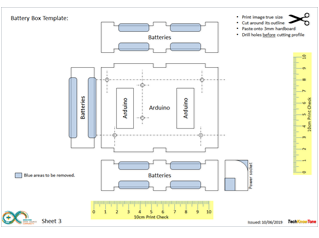
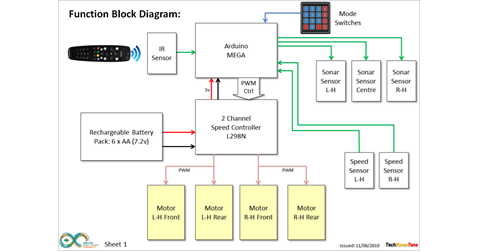
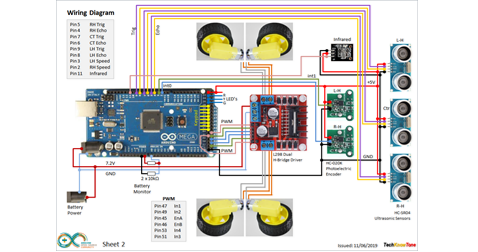
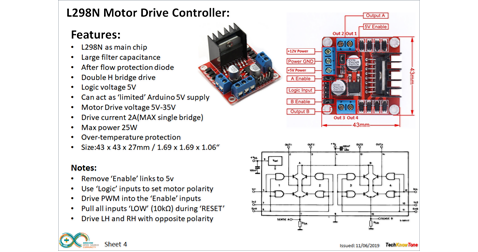
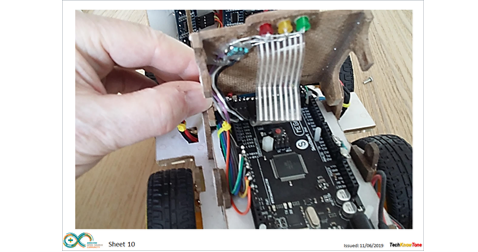
| In the attached files I have included details on how the car is wired up, along with additional information on the H-bridge motor driver, the optical speed sensors, drive motors and batteries. Whilst my design uses an Arduino MEGA, it may be possible to achieve the same result using a UNO, as the pin count is not that high and the code only consumes 14% of available memory. Whilst the L298N motor driver worked well, there are other options available these days using power MOSFETs which, due to their very low on resistance, don’t require heat sinks. You’ll see examples of that used in later projects. As you can do everything using the infra-red remote control, there is scope for not including the keypad, and other battery options are available. |
|||||||
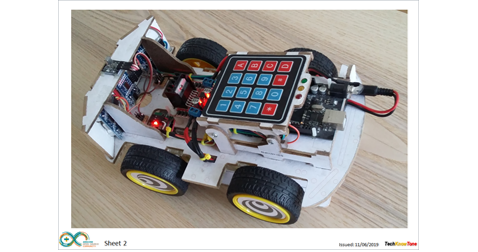
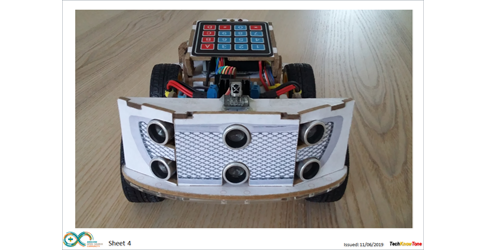
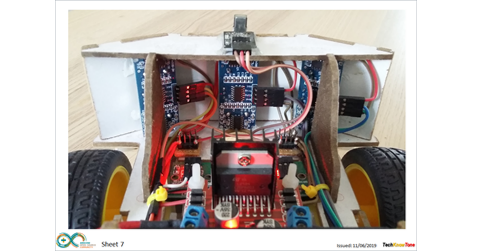
As this project was undertaken ahead of me creating a web site and documenting projects in detail, I am unable to provide detailed step by step instructions. However I have attached a photo album taken from the current car, which will hopefully go a long way towards helping you complete this project or give you ideas for one of your own.
The design also developed over time, and some of the features may therefore appear somewhat adhoc or piecemeal. For sure if I had then a 3-D printer and the modelling capabilities I have now, this design would have been approached somewhat differently. So be critical of what I have done and seek to develop your own solutions, which will hopefully turn out better.
Design Files
The following files can be downloaded to help you complete this project. Each has a hyper-link and an associated description. Depending on how your web browser is configured the links will either open the files directly into the browser or offer them as downloads.
Circuit Diagram - a drawing of what is seen in the view above, plus veroboard wiring. Use it as a guide to wiring up your project.
Parts list - the things you will need purchase, with budget prices.
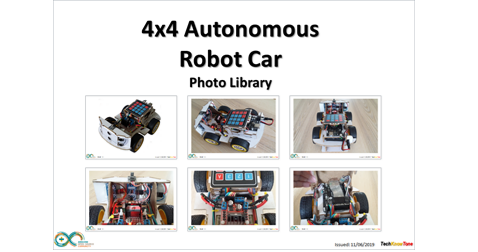
Photo Library - a pdf file containing detailed images of the finished car.
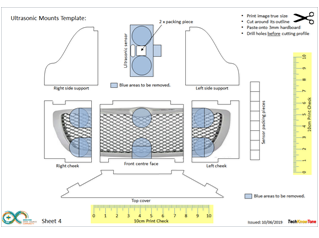
Templates - a pdf file containing 2-D drawings which you can print off and use as templates.
Software Code - the all important Arduino .ino file which runs the project. See comments below on coding.
Demo Functions Card - a pdf file which aims to explain the key functions accessed by the keypad and/or TV remote control.
Libraries
This project relies on the use of one library IRremote.h, which are included in the Arduino IDE set-up. This library is used to decode the codes received by the infra-red receiver device. Note that depending on which TV remote you choose to use, and whether or not it is a programmable unit like the one listed in the Parts List, you will potentially receive a different set of codes to those specified in the .ino file. This is normal and expected, and part of the interesting challenge of using an infra-red device. You will normally use the IDE Serial Monitor to view the codes being received for a given button on the remote, and if it is programmable, set the remote such that it develops a unique code for each button you wish to use. Once you have discovered these codes you can use them again in future projects.
Need more information?
Web pages take quite some time to develop and maintain. If you you would like me to include more information to enable you to tackle this project, then send me an email explaining what you need. Or if you just want to give me some general feedback on this site, or to suggest projects what I might include which would be interesting to you, I’d be pleased to hear from you.